fbpx
Minnesota 612-469-9707
Home Inspections Blog

Category Archives: Homeowner Tips

Prepping Your Home For A Minnesota Winter

Prepping Your Home For A Minnesota Winter

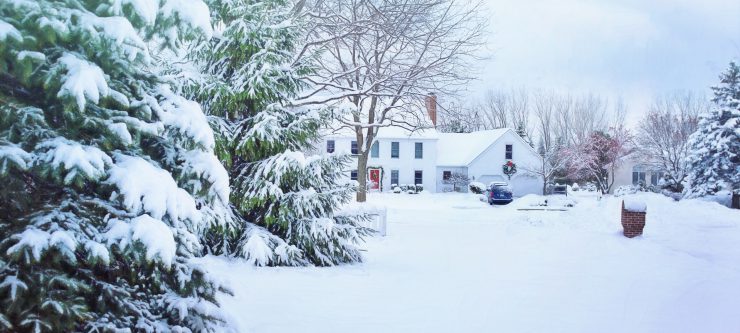
When winter hits, the cold temps and massive amounts of snow can put your house to the ultimate test. To make sure your home is still standing come March, take a stroll through your home to see if you’re following these necessary precautions.


Indoor Prep

Sealing Air Leaks

Windows, doors, and their trim work are great at inviting cold, outside air into your home. Use the flicker of a candle or the back of your hand to find places where cold air is leaking in (and where your precious heat is escaping!).

Use a caulking to seal any gaps around windows and trim. For leaky doors, use felt or foam weather stripping and door sweeps. These are all cheap and easy to work with.

Shut Off Water To Hoses

When water sits in pipes that lead to the outside, cold temps can freeze, expand, and burst out, turning your basement into a swimming pool. Find the valves of the pipes leading to your outside faucets (they’ll be inside your home near the main water shutoff valve) and turn them off. Then drain the water from the faucet on the side of your house.

Close Chimney Damper

When you’re not using your wood-burning fireplace, close the chimney damper to prevent drafts of cold air from coming into your home. You should also have your chimney inspected and cleaned to prevent fire damage during those cozy winter evenings by the fireplace.

Insulate Pipes In Cold Areas

Add insulation sleeves over water pipes in cold areas of your home, like the attic, basement, and crawl spaces. When these water pipes get too cold, they can freeze and burst.

Change Furnace Air Filter

A clean air filter can keep warm air moving and energy costs down. Replace your furnace filter before winter (every 3 months during the warm seasons) and every month throughout the winter.

Program Your Thermostat

Programming your thermostat can also bring down your energy costs. Set your daytime temp to a comfortable level (68F to 75F is often preferred) and a lower temperature at night when you’re bundled up in bed (maybe around 60F to 68F). If the house is empty during the work or school day, program a lower temp then as well.

Reverse Ceiling Fans

Many homeowners don’t realize that ceiling fans have two spinning options: clockwise and counterclockwise. Your fan should spin clockwise during the winter to allow warm air above your head to be pulled down, and counterclockwise in the summer so cold air at your feet rises up.

Check the center of your fan for a small switch to change the spin when the temperatures start dropping.

Stock Up For The Snow

It’s hard to drive to the store to buy a shovel when your driveway is buried under 4 feet of snow. Head to the store early to get your winter gear if you don’t have them already:

  • Ice-melting sidewalk salt
  • Snow shovels
  • Car window scrapers
  • Snow shoveling apparel (boots, gloves, mittens, hot cocoa)
  • Winter windshield wiper fluid
  • A snow blower (and gas, oil, spark plug, etc.)


Outdoor Prep

Have Your Sprinkler System Drained

If you have an in-ground sprinkler system, have your pipes drained and prepped for the winter. This is different than draining your outside faucets, so be sure to do both!

Prepping a sprinkler system is usually better left to a professional, but the labor costs are much lower than renovating a flooded basement.

Check The Roof For Damage

Take a look at your roof. See if you have any missing or damaged shingles or flashing, or drill holes that haven’t been sealed. Any puncture in your roofing can lead to leads and mold.

Clean Your Gutters

Once the leaves stop falling, grab a ladder and get to work on those gutters. Since leaves and debris will impede water flow in gutters, any melting snow will quickly form icicles. Falling water also damages grass and sidewalks.

Store Away Outdoor Items

Pack up outdoor furniture, hoses, and decorations that can get damaged in the cold temps and snow. Don’t forget about seasonal plants in the garden, and draining the gas out of your mower.

Review Winter Emergency Plans

When a pipe bursts and is flooding the basement, seconds count. This makes it important for you and your family to know what to do in case of a winter emergency.

Make sure every occupant knows where the main water shutoff valve is and how to turn it. You should also have a list of emergency water damage and storm damage contractors ready to call if disaster happens.

Trim Tree Branches

Are any tree branches swaying dangerously close to your roof or siding? Strong winter winds and heavy snow can easily give tree branches extra space to swing, so trim them to be about 3 to 8 away from your home.

Cover Vents To Prevent Nesting

Birds and rodents love to find warm places in the winter to set up shop. Make sure you have possible entrances blocked off:

Carbon Monoxide Detectors: Facts and Tips

You might have heard of carbon monoxide as a silent killer. It’s truly undetectable to the human eye and nose and hundreds of people die from it every year in the United States.

This gas has no color or odor and forms from gas, oil, wood, and coal as a result of faulty appliances and other sources in your home. Some places carbon monoxide originates from include:

  • Furnaces
  • Stoves and ovens
  • Clothes dryers
  • Grills (gas and charcoal)
  • Automobile engines
  • And more

These sources are found in almost every home, and if they’re malfunctioning or installed poorly, they could put you at risk of carbon monoxide poisoning. If the gas is present in your home, the only way to make sure you’re aware of it is to install a carbon monoxide detector in your home.

Where to avoid installing your carbon monoxide detector

If you’ve recently purchased a carbon monoxide detector, you’ve made a great decision that could save your life in the future. However, there are places in your home to avoid when choosing a place to install it. Places to avoid include:

  • Immediate proximity of fuel-burning appliances (under 5 feet away)
  • Bathrooms and other humid areas
  • Near places where chemicals are stored, such as kitchens
  • Garages, furnace rooms, or other dusty and dirty places.
  • Crawlspaces, attics, and porches
  • Near ceiling fans, vents, A/C units, and windows

Seems like there are a lot of places to avoid, right? It may seem tedious, but you can never be too careful when it comes to carbon monoxide and safety.

Where to install your carbon monoxide detector

Now that you know some bad locations for a carbon monoxide detector, it’s important to know the good locations. The best parts of your house to install a carbon monoxide detector include:

  • 10 feet or less from each bedroom door and close to all sleeping areas
  • Each and every floor of the house
  • Close to, but not directly above, combustion appliances like furnaces, water heaters, fireplaces
  • On the ceiling of rooms with a permanently installed fuel-burning appliances
  • Every HVAC zone of the house (and commercial buildings)

Carbon monoxide is an extremely dangerous gas that must be taken seriously. In addition to adding detectors to your home, you should also consider home inspections and yearly appliance inspections. If you need a home inspection, we’re here to help. Contact us today to schedule a home inspection!

How to Prevent and Remove Mice From Your House

How to Prevent and Remove Mice From Your House

What to do with your uninvited guests that show up in the fall? I’m not talking about the in-laws.

This the prime time of the year for rodents to pack up and move into your home. Once they get in and find a nice comfortable place, guess what comes next? That’s right, they want to start a family!

The gestation period for mice is just 21 days and can produce more than a dozen babies. A healthy female delivers up to 10 litters per year. That is a lot of mouths to feed, and it might be best to keep the critters out of the house completely.

Mice can pass through a hole the size of a dime. They’re limited only by the size of their skulls. They have no collar bones or shoulders to pull through, so if the head can poke through, the body will follow.

To keep the rascals out, carefully inspect the exterior of your home. Look for small, unsealed openings along the foundation and at any wall cladding penetrations like utility access point or vents, and around doors and windows. Plug any small openings with steel wool or metal mesh.

A mouse has two big front teeth they use to chew through most everything except metal and concrete. A common entry point is the garage door. Carefully inspect the bottom and side seals at the garage door and repair or replace as necessary to prevent entry. Careful inspection of the interior areas of foundation and attic can also reveal potential entry points. This is, of course, the practice of exclusion and would ideally keep out the mice.

Even though mice have poor eyesight, they are better at finding these entry points than we are. If you see evidence of activity inside your home, the first course of action is to attempt to eliminate the easy food sources like pet food, bird seed, or other stored items that are an easy target. Store pet food in a sturdy, tight-sealing container and do not leave bowls out overnight.

The next course of action is to evict any of the unwelcome rodents. Setting out poison where you have noticed activity is an option, but it can be dangerous for children and pets and then there is the issue of the poisoned mouse’s final resting place.

A dead mouse in the house can cause an unpleasant odor and is next to impossible to find. Consider using snap traps and glue traps. Mice are curious and will inspect something new in their environment, especially if it smells like food. It also provides positive confirmation of your mouse activity and success rate.

These procedures should help eliminate or prevent the majority of any rodent problems. If you find the problems persist, there are many professional exterminator contractors that can lend a hand.

When purchasing a home, always hire the pros at Comfort Home Inspections to help identify evidence of rodents or pests during a thorough home inspection.

Using Wood Mulch Against Your House

Using Wood Mulch Against Your House

Landscaping with wood mulch against the foundation of your house can increase curb appeal and add health to your lawn. It also comes with precise installation steps and even hazards down the road. Here’s an overview of what to expect if you’re planning on laying wood mulch around your home.

The Purpose of Mulching

Adding a layer of mulch around your home has a few different benefits:

Preventing weeds. A layer of mulch a few inches deep can help repress weed growth. Some homeowners use a layer of landscaping fabric or plastic for an added barrier against unwanted weeds.

Plant moisture. Mulch retains moisture from rain and sprinklers. This extra moisture helps feed shrubs and flowers, especially during dry periods.

Better appearance. Mulching adds color, texture and can hide parts of your foundation.

Possible Dangers of Wood Mulch

While wood mulch can keep your garden and soil healthy, it can cause serious damage to your property if not correctly installed.

Fire hazard. Some types of wood mulch are more flammable than others, like shredded western red cedar. Other types, however, can still ignite if they become too dry.

Pests and insects. Mulch is known for harboring termites and other insects. Termites thrive in the moisture held by mulch and feed on the cellulose in the wood. They also like the cover of mulch and use it as an avenue to get into the wooden framework of your home.

For these reasons, it’s recommended that you leave a one-foot-wide strip of soil between your home and your mulch, or 6 inches of space or more between mulch and your siding or framework.

If you’re purchasing a house, ask your home inspector about mulching near your foundation. Depending on your region and landscaping plans, your home may be more at risk than others for mulching dangers.

Other Types of Mulch

If you don’t want to use woodchip mulch, there are loads of other types of mulching, each with its own benefit.

Rubber mulch. Mulch made from shredded rubber can last for decades, doesn’t decompose, and can come in virtually any color.

Gravel or rocks. Heavier mulch like gravel and rocks won’t blow away or move easily. They also won’t decompose, catch fire or fade in color as quickly as other types of mulch.

Straw. Straw is good for insulating during cold periods. It’s lightweight, so it’s easier to move and lay down. It’s also cheaper compared to other mulch.

Pine needles. If you have plants that feed off of acidic soil, pine needles are a great option. Pine needles raise the PH level of soil, come cheap and give a unique look to your yard.

Steps to Adding Wood Mulch

  1. Uproot any weeds. Spray the area with weed killer for added protection.
  2. Make sure the soil is sloped away from the foundation. The guideline is a 5% slope down or 6 inches lower for every 10 feet away from the foundation.
  3. For another barrier from weeds, layer the area with landscape fabric or plastic. If you plan on planting, cut slits wide enough for the shrubs or flowers to grow.
  4. Add edging to keep the mulch from falling into your lawn. You can use plastic or metal edging or even stone or brick.
  5. Add your mulch. You’ll only need 2 to 4 inches of cover. Even out the mulch with a rake and water to add moisture and prevent it from blowing away.